Chat Flow User Guide
User GuidesRelease NotesFAQsSupport
5.52.0
5.52.0
  • 🏠Return to Home Page
  • 🔎Overview
    • Chat Flow Overview
    • Quick Start
  • 🪛Configuration
    • Access Chat Flow
    • Configure a route
    • Add an API integration
    • Set up keywords
    • Set up session timeout events
    • Manage your workflow assets
  • ✅Channel Capabilities
    • Configure channel display type
    • Use WhatsApp with Chat Flow
      • Initiate WhatsApp conversations
      • Send WhatsApp message templates
      • WhatsApp Interactive Messages
      • WhatsApp Commerce Messages
    • Use Apple Messaging for Business with Chat Flow
      • Apple Interactive Messages
      • Apple User-Facing Nodes
  • 🔃Workflow management
    • Build a workflow
      • Add a workflow
      • Delete and restore nodes
      • Repeat a step in a workflow
      • Dynamic API Workflows
    • Edit/delete a workflow
    • Search, Find & Replace in a workflow
    • Duplicate, rename, or move a workflow
    • Preview workflows
      • Preview flow on different channels
      • Preview logs
    • Approve and deploy workflows
      • View flow details
      • Submit a workflow for approval
      • Approve/decline a workflow
      • Deploy a workflow to production
  • 😎User-Facing Nodes
    • Display nodes
      • Contact Sending
      • External Link
      • Location sharing
      • Media
      • OTP Menu
      • Rich Link
      • Text Display
    • Product nodes
      • Clickatell AI node
      • Chat Desk node
    • Input nodes
      • Contact Receiving
      • OAuth Request
      • Request Input
      • Send Form
      • Time Picker
    • Commerce
      • Chat 2 Pay
      • Multi Product
    • Branch/logic split
      • Dynamic List
        • Apply patterns, custom indexes, filtering, and exclusions
      • Menu
      • Multiple Choice Input
  • 🎬Action Nodes
    • API Integration node
    • Calculate
    • Date Format
    • Display List
    • Encrypt
    • Is Empty
    • Is Null
    • Number Format
    • Regular Expression
    • Remap
    • Send Template
    • Set Variable
    • Switch Case
    • Wait For Callback
    • Opt-Out nodes
  • 🔗Integrations
    • Integration nodes
  • 🔡Variable management
  • Using system variables
  • Referring to variables
  • 📊Reporting & Analytics
    • Analytics Settings
    • Collections & reporting labels
    • Clickatell Portal Reports
  • ❗System error codes
    • System Error Codes
  • 💡Help & Information
    • What's New? 🎈
    • Release Notes
    • FAQs
    • Return to Home Page
Powered by GitBook
LogoLogo

© Copyright 2024 Clickatell. All rights reserved.

On this page
  • Edit a workflow
  • Delete a workflow

Was this helpful?

  1. Workflow management

Edit/delete a workflow

Was this helpful?

Edit a workflow

Workflows are listed either individually or grouped into folders in the panel on the left. Standard flows have a grey icon and dynamic API flows have a different yellow icon.

  1. Search and select the flow you want to edit from the list.

  2. Click on the node to edit the information in the panel on the right.

  3. Save your node and your workflow after making any changes.

Workflows can only be created and edited in the Sandbox environment. The Production environment is completely non-editable, and serves as a read-only view of all your flows currently in Production (i.e., flows that are live to customers).

Dynamic API workflows (indicated by the yellow icon) are created by Clickatell on your behalf and are not editable.

Currently, the only way to create a folder is to add a new 'blank' flow and saving it using the name of the folder you want to create. In your flow list on the left, right-click on the flow you want to move to the folder. Select 'Move' and then select the 'blank' flow you've added before. This 'blank' flow will now convert into a folder containing your flow.

Delete a workflow

Note that currently, it is not possible to restore a deleted flow, so only delete a flow if you are sure you want to permanently remove it.

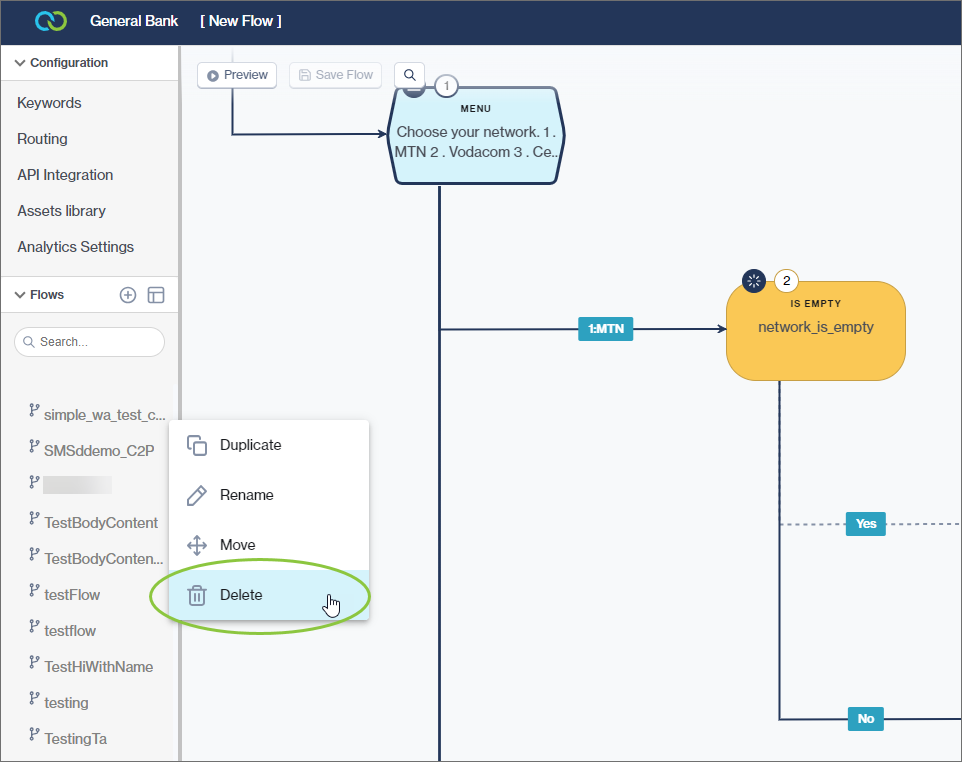
  1. Click the three dots icon next to the flow you want to delete to access a drop-down menu.

  2. Select "Delete".

  1. If the flow is linked to other flows, routes, or keywords, you have to disconnect the linked flow/route/keyword before you can delete the flow.
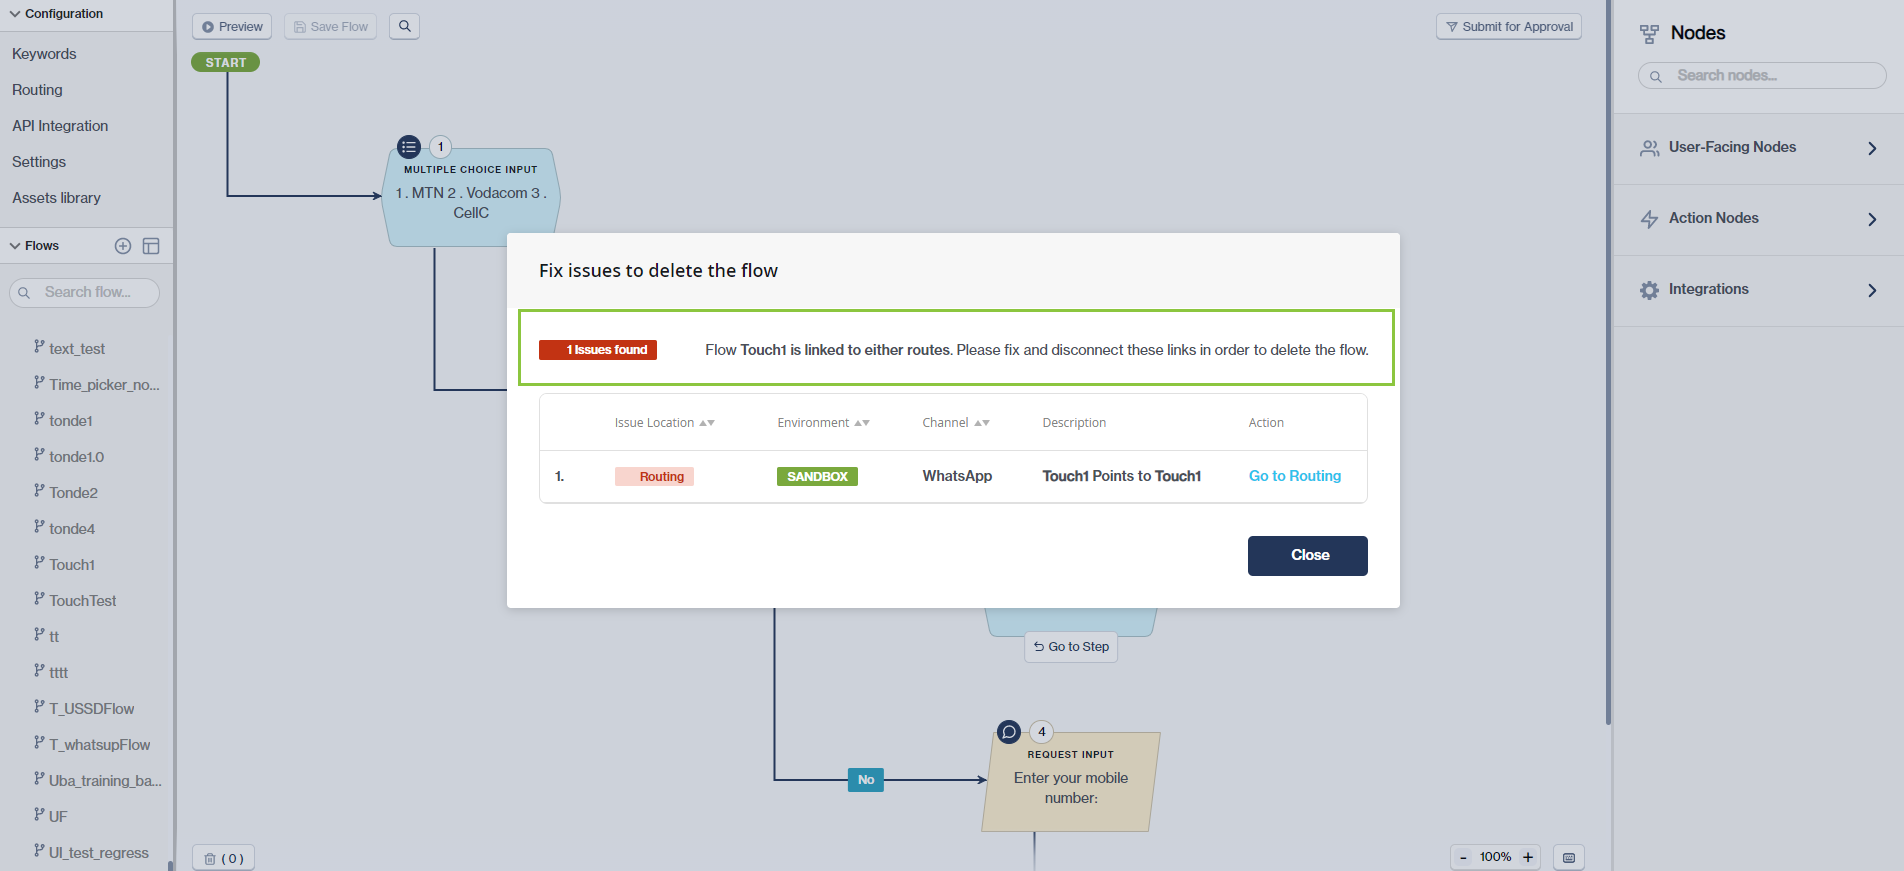
Any user can delete flows from the Sandbox environment, however, a deletion request is needed when deleting a flow from the Production environment.

The image below shows the screen when a request to delete a flow from production has been submitted for approval.
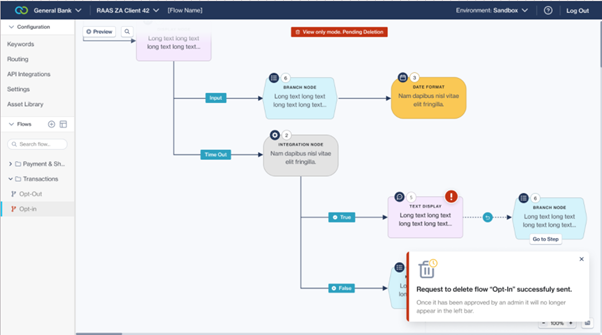
A Chat Flow administrator must first approve a deletion request from the before the flow will be removed.

🔃
Manage and approve flows section