Chat Desk User Guide
User GuidesRelease NotesFAQsSupport
  • 🏠Return to Home Page
  • 🔎Overview
    • Chat Desk Overview
  • 💻Chat Desk Dashboard
    • Access the Chat Desk Dashboard
    • Configure Chat Desk settings
      • Business profile
      • Chat tags
      • Auto responders
      • Preferences
      • Surveys
      • Canned replies
      • Integrations
      • Clickatell AI
    • Manage departments
    • Download transcripts
  • 🤝Agent Desk
    • Access & navigate the Agent Desk
    • Manage chat queues (Agent Desk)
      • Chats and tickets
      • Manage tickets
      • Pending chats
      • Close chats
    • Search, filter, and sort chats & tickets
    • Chat capabilities
      • Send attachments (media files)
      • Send voice recordings
      • Send emoticons
      • Share locations
      • Use canned replies
      • View chat events
      • Send 1-way SMS
    • Use suggested responses (Clickatell AI)
    • Authenticate customers
    • Send payment requests via Chat 2 Pay
    • View customer details from 3rd party applications
    • Send WhatsApp message templates
    • Transfer chats
    • Manage customer profile
  • 🦸Supervisor Desk
    • Access & navigate the Supervisor Desk
    • Manage chat queues (Supervisor Desk)
      • Chats and tickets
      • Manage tickets
    • Search, filter, and sort chats & tickets
  • 📊Reporting & Analytics
    • Dashboard Metrics
    • Clickatell Portal Reports
  • 💡Help & Information
    • What's New? 🎈
    • Release Notes
    • FAQs
    • Return to Home Page
Powered by GitBook
LogoLogo

© Copyright 2024 Clickatell. All rights reserved.

On this page
  • Transfer a live chat
  • Accept a transfer
  • Reject a transfer
  1. Agent Desk

Transfer chats

PreviousSend WhatsApp message templatesNextManage customer profile

As an agent, you can transfer live chats to another department or online agent if you are unable to assist a customer.

Agents cannot transfer to other agents. This can only be done by Supervisors.

Transfer a live chat

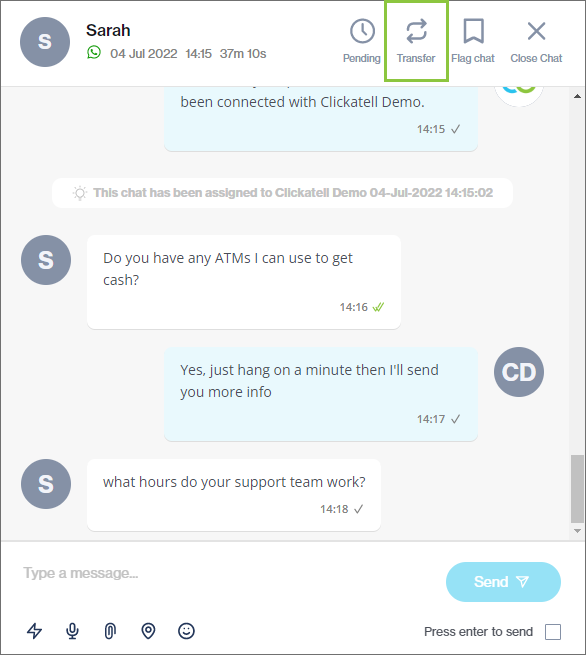
  1. Select a live chat and click the Transfer button at the top right-hand corner of the chat.
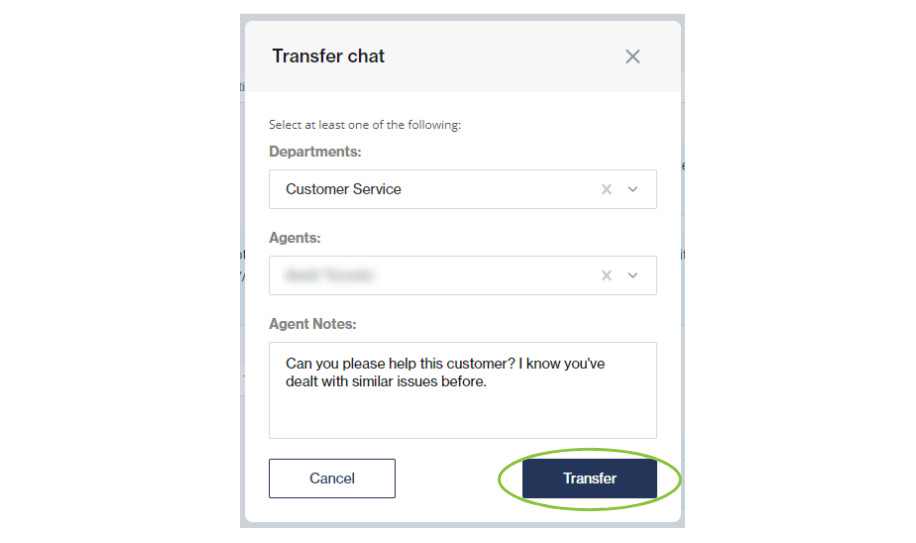
  1. From the drop-down, select the department and/or agent you want to transfer this chat to.

    • Only agents that are currently online and available are listed in the drop-down.

You cannot transfer a live chat to a department where no agents are currently available to receive the chat.

  1. Type in a note for the receiving agent and click Transfer.
  1. An animation in the left panel indicates that your chat is being transferred.

  1. You can cancel the transfer by clicking Cancel transfer (the initial Transfer button).

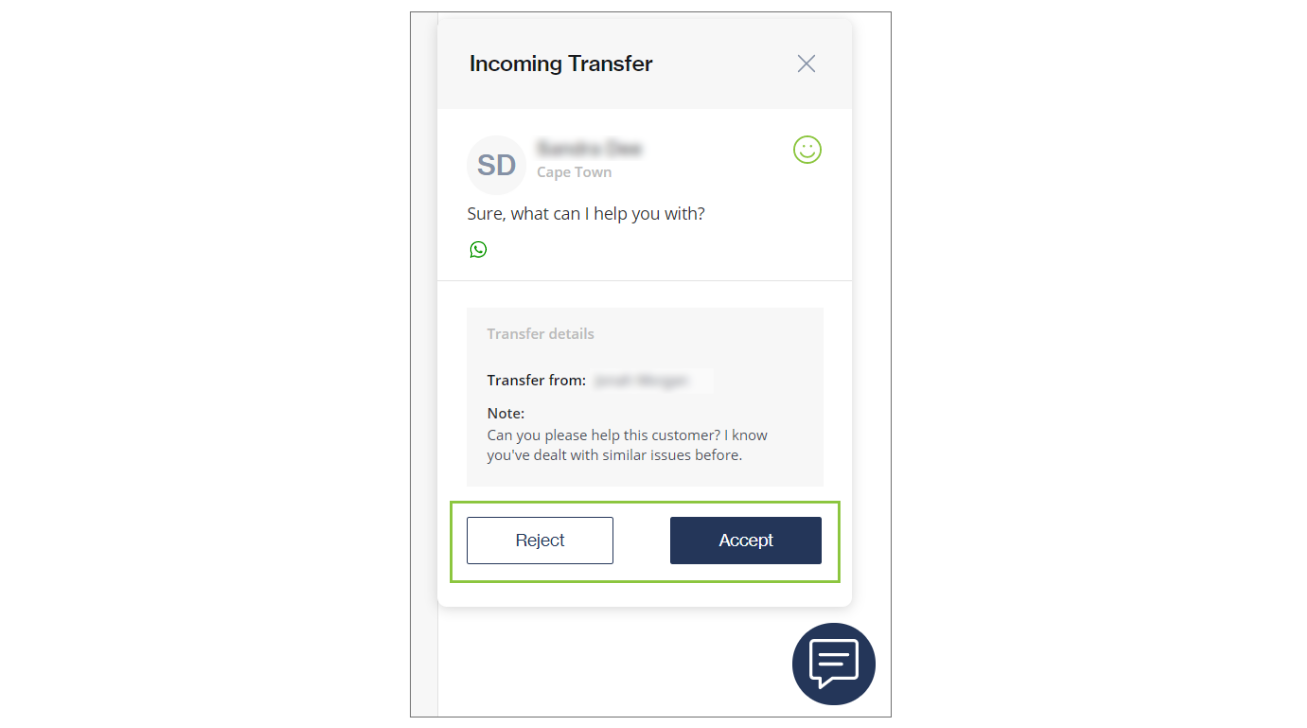
  1. The agent you selected will receive a request to accept your chat transfer. If the agent accepts the transfer, your chat is transferred and will no longer be in your queue. If the agent declines the transfer, the chat remains open in your queue.
Accept a transfer

If the transferred chat isn't accepted within 20 minutes, it is transferred back to the original agent.

If the agent accepts the transfer, the chat appears in the roster view (left pane) of the agent to whom it was transferred. The chat disappears from the first agent's roster view.

Reject a transfer

If the chat transfer is rejected, the chat is sent back to the original agent. The Transferring chat... animation stops and the original agent must accept the rejection. The chat appears in the original agent's roster view again.

🤝
tickets