Chat Desk User Guide
User GuidesRelease NotesFAQsSupport
  • 🏠Return to Home Page
  • 🔎Overview
    • Chat Desk Overview
  • 💻Chat Desk Dashboard
    • Access the Chat Desk Dashboard
    • Configure Chat Desk settings
      • Business profile
      • Chat tags
      • Auto responders
      • Preferences
      • Surveys
      • Canned replies
      • Integrations
      • Clickatell AI
    • Manage departments
    • Download transcripts
  • 🤝Agent Desk
    • Access & navigate the Agent Desk
    • Manage chat queues (Agent Desk)
      • Chats and tickets
      • Manage tickets
      • Pending chats
      • Close chats
    • Search, filter, and sort chats & tickets
    • Chat capabilities
      • Send attachments (media files)
      • Send voice recordings
      • Send emoticons
      • Share locations
      • Use canned replies
      • View chat events
      • Send 1-way SMS
    • Use suggested responses (Clickatell AI)
    • Authenticate customers
    • Send payment requests via Chat 2 Pay
    • View customer details from 3rd party applications
    • Send WhatsApp message templates
    • Transfer chats
    • Manage customer profile
  • 🦸Supervisor Desk
    • Access & navigate the Supervisor Desk
    • Manage chat queues (Supervisor Desk)
      • Chats and tickets
      • Manage tickets
    • Search, filter, and sort chats & tickets
  • 📊Reporting & Analytics
    • Dashboard Metrics
    • Clickatell Portal Reports
  • 💡Help & Information
    • What's New? 🎈
    • Release Notes
    • FAQs
    • Return to Home Page
Powered by GitBook
LogoLogo

© Copyright 2024 Clickatell. All rights reserved.

On this page
  1. Agent Desk

Authenticate customers

PreviousUse suggested responses (Clickatell AI)NextSend payment requests via Chat 2 Pay

Client authentication using OAuth 2.0 allows agents in Chat Desk to authenticate their customers before they perform certain operations to protect them from fraudulent activities.

Clickatell will assist you in setting up your desired Identity Providers via the Clickatell Portal.

Use the OAuth extension

  1. Click the Extension (puzzle) icon.

  2. In the panel on the right, select the OAuth configuration (IDP) you want the customer to use to authenticate themself.

All enabled Identity Providers (IDPs) will automatically pull through to this list in Chat Desk.
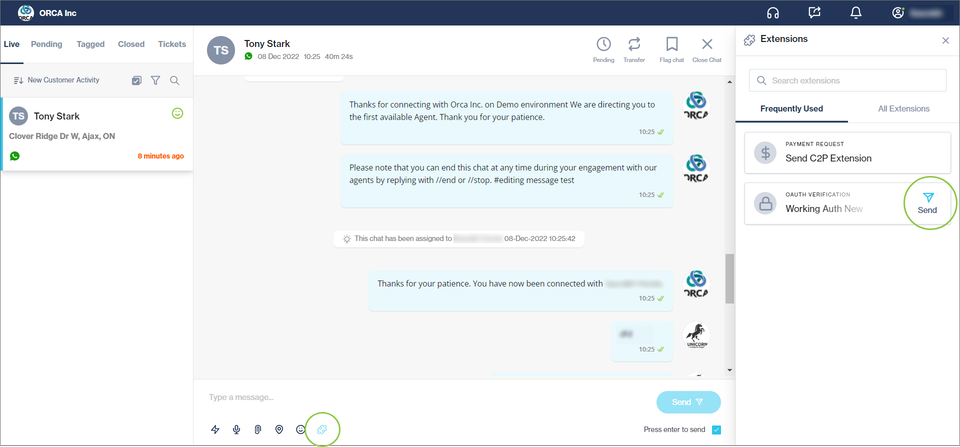
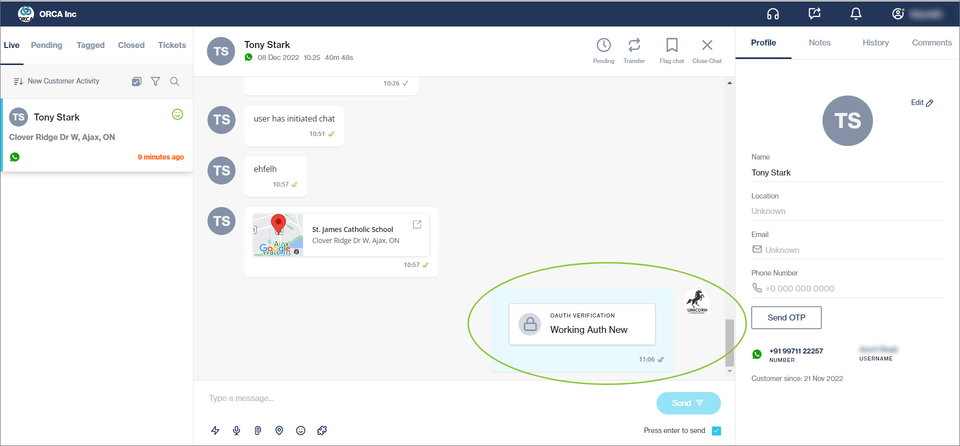
  1. An authentication request is sent to the customer as a URL. Clicking this link opens the login (authentication) page of the selected IDP.

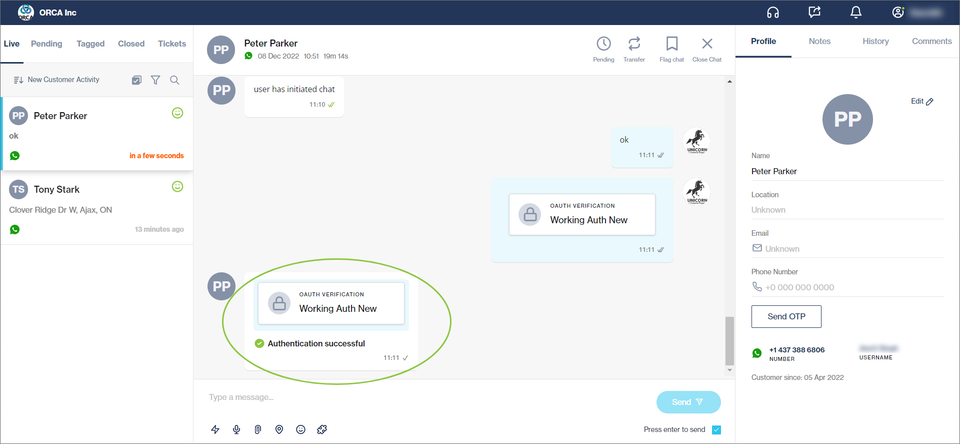
  2. Once the customer enters their details and is authenticated successfully, they are directed back to the channel they were engaging on.
  1. The outcome of the authentication is shown in the chat window.
🤝
set up in the Clickatell Portal