User Management
You can add as many users as you need to your Clickatell account.
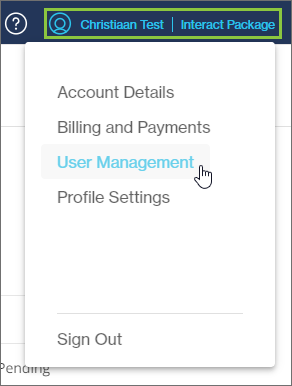
Click on the profile icon in the top right corner and select User Management.
Add and edit users
Adding a new user
Click + New User.

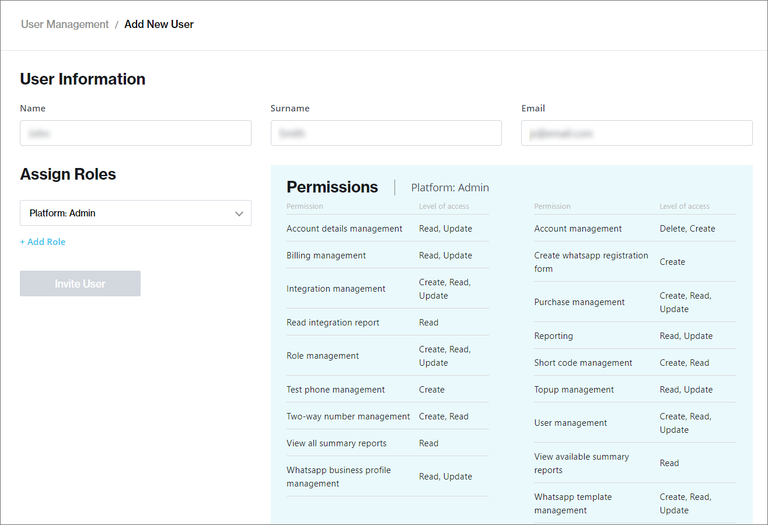
Add the user's details.
Assign one or more roles to the user.
Select a role from the drop-down for more information about the permissions associated with the role (view in the blue block).
If you've added any custom roles, these are also listed in the drop-down to select from.
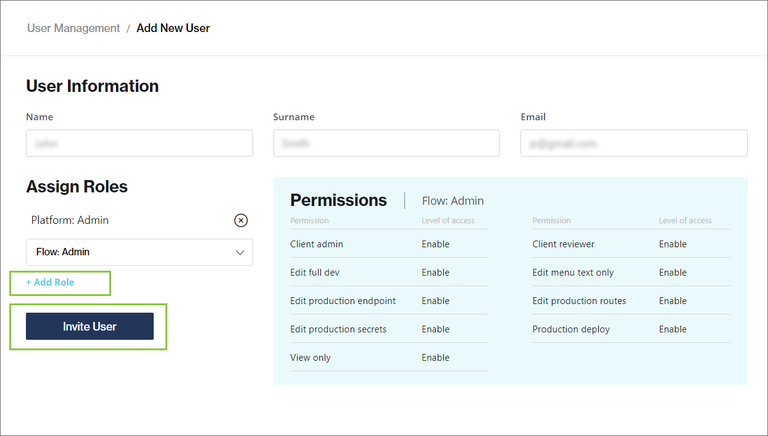
Click + Add Role to assign this role to the user.
You can assign more than one role per user.
To remove an assigned role, click the "X" icon next to it.
Click Invite User to send an email invitation to the user.
The email contains a link the user uses to set a password and access the portal according to the roles and permissions you've assigned to them.
The password must be a minimum of 12 characters and contain at least one lowercase letter, one uppercase letter, one number, and one special character.
The new user is added to the Users table with the status of "Invite Pending". This will change to "Active" once the user accepts the invitation and logs in to the portal.

Editing an existing user
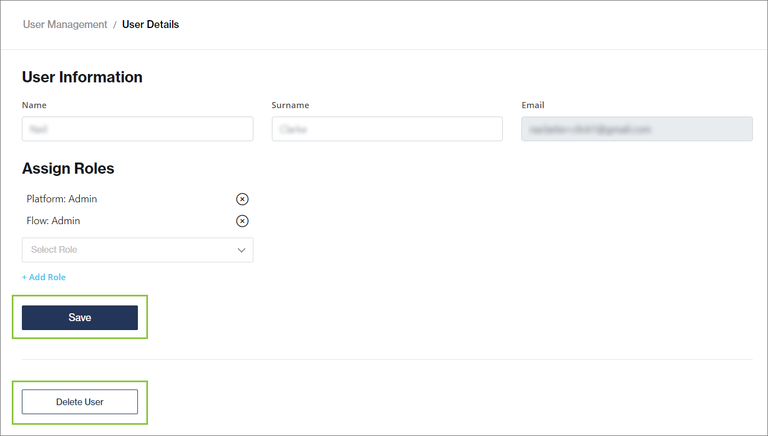
Select the user you want to edit from the Users table.

Make your changes and click Save.
You can also delete the user from here.
Create and assign custom roles
You can add and edit custom roles with a bespoke combination of permissions to assign to users.
Add a new custom role
Click Custom Roles.
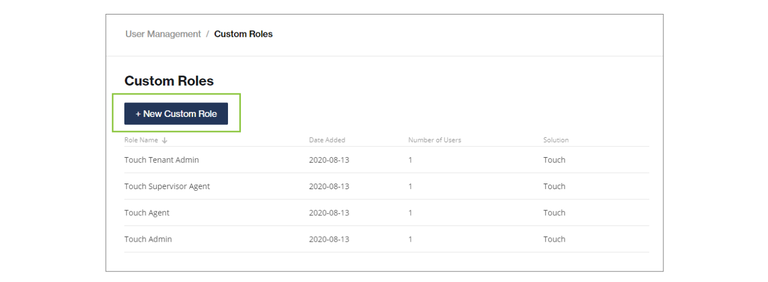
All custom roles already added to your account are listed in a table.
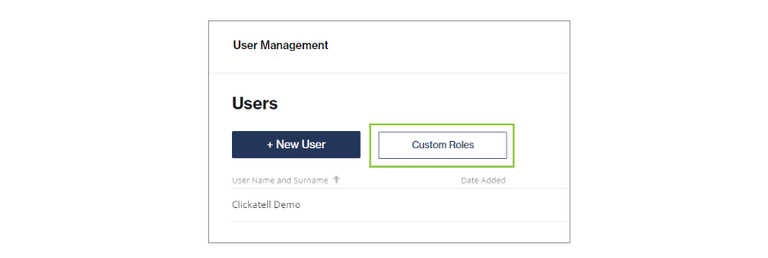
Click +New Custom Role.
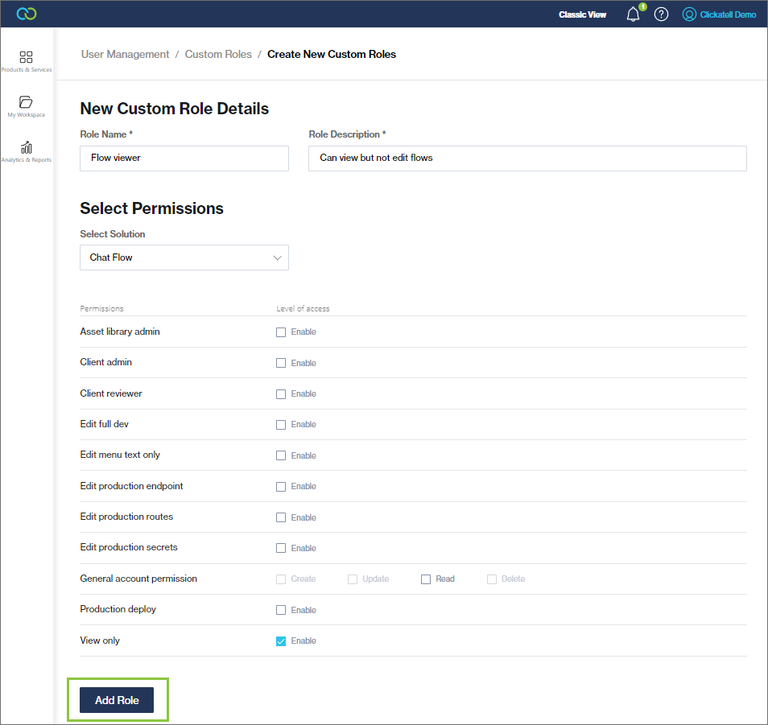
Give a name and description for the custom role and select the permissions that must be associated with this new role.
Click Add Role.
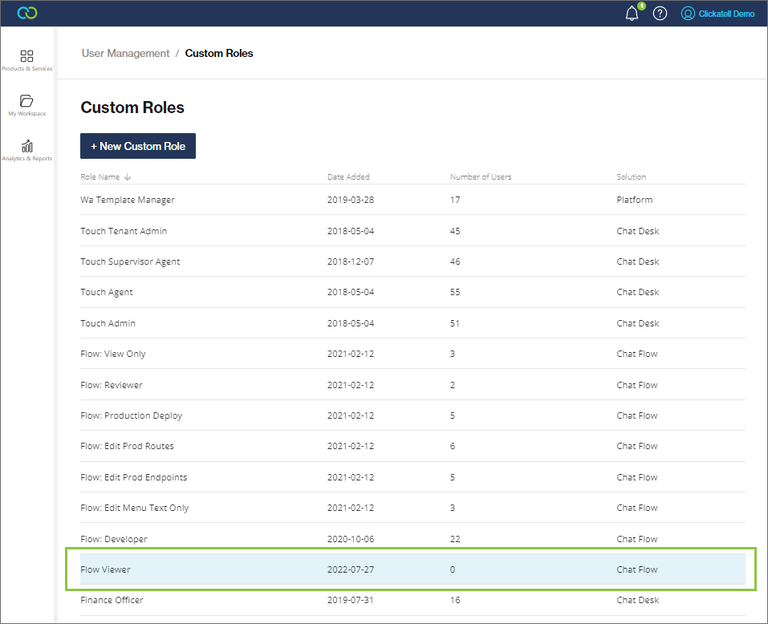
The new custom role is added to the Custom Roles table and is available to assign to users when adding new or updating existing users.
Edit a custom role
To edit an existing custom role:
Select the role you want to edit from the table.
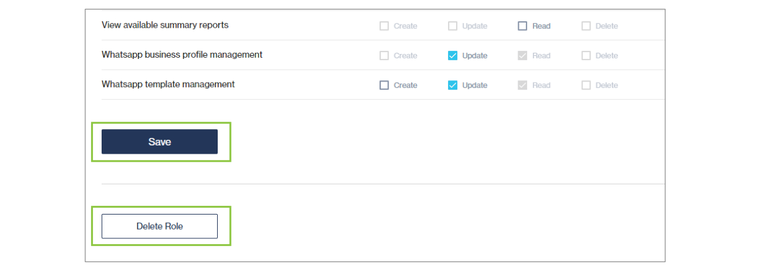
Make your changes and click Save.
You can also delete a role from here.
Enable SAML & Social Login
In addition to logging in to their Clickatell account with a username and password, you can also let users log in using:
SAML Login: Enables single sign-on using the credentials you've set up for your identity provider (IDP) in the Clickatell Portal.
Social Login: Enables sign-in via a Google account.
SAML and Social Login enable quicker and easier sign-in without compromising the security of user accounts.
SAML login
You must configure a specific Identity Provider (IDP) for SAML Login. Once enabled, users will log in to their IDP first through single sign-on before accessing their Clickatell accounts.
To enable SAML login:
Navigate to User Management -> SAML.
Click the Add Domain & Configuration button.
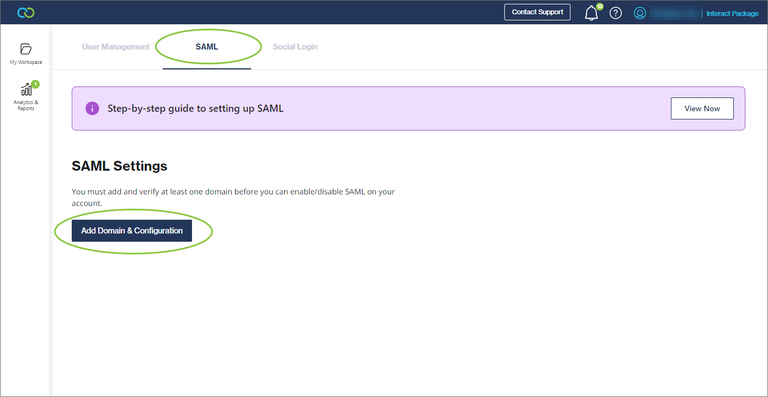
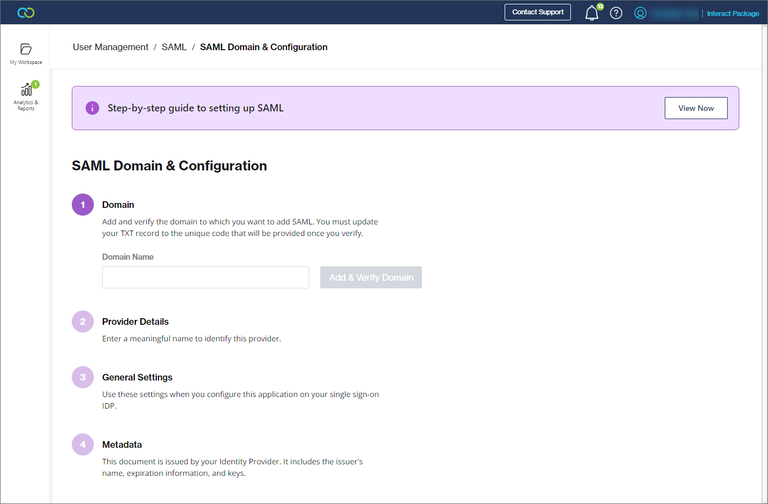
Follow these steps to complete the SAML setup:
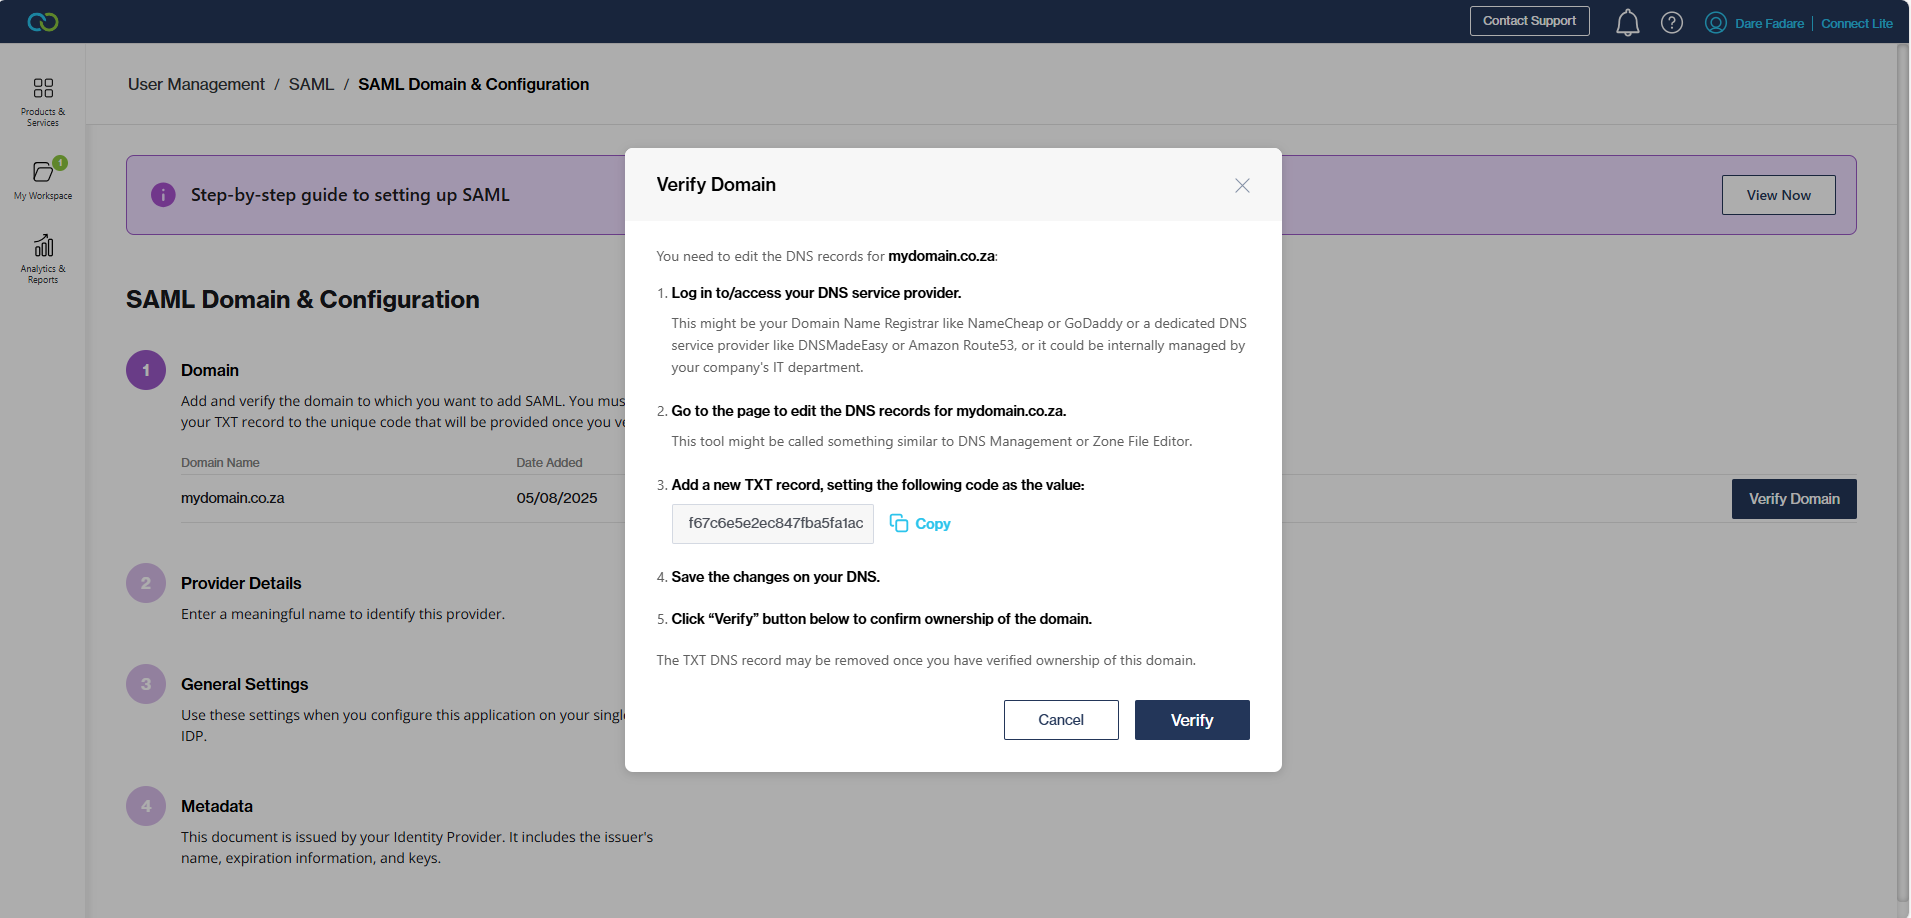
Add and verify the domain to which you want to add SAML, e.g., newtest123.com.
To complete the verification of the domain, you will be required to login to your DNS provider and follow the steps below:
Note: Domain verification could take a couple of hours.
c. Once your domain is verified, add a name to identify your provider.
d. In the general settings, copy the Identifier and Reply URL displayed after saving your Provider Name, and use them in your identity provider configuration to generate a metadata document.
e. In the metadata, specify the identifier within the SAML response where a user's email address is found, then upload the metadata file.
When the SAML configuration is complete, enable SAML login for the domain using the toggle switch.
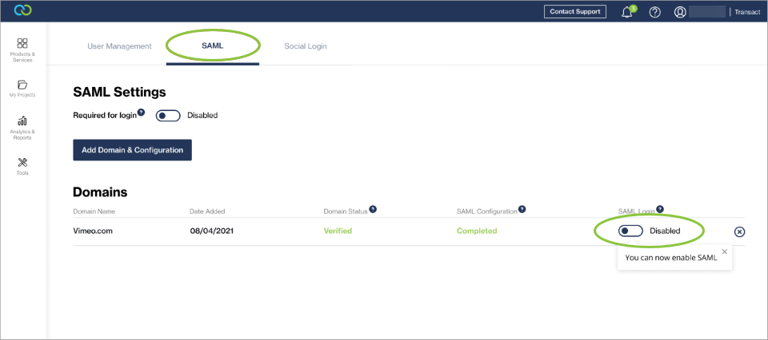
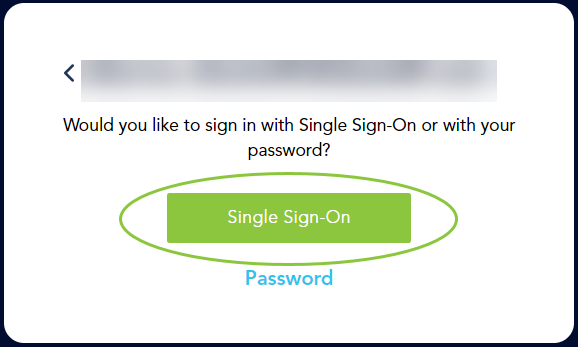
On sign-in (after entering their email addresses), users can use the Single Sign-On button to access their Clickatell accounts.
SAML login is optional by default. You can make SAML login mandatory by enabling the Required for login toggle switch. Mandatory SAML login can be disabled again at any time.
Note: Enabling mandatory SAML login will affect all users of your organization.

Social Login
You can only enable Social Login on Clickatell accounts linked to Gmail accounts.
To enable Social Login via Google:
Navigate to User Management -> Social Login.
Enable the toggle switch for Google login.
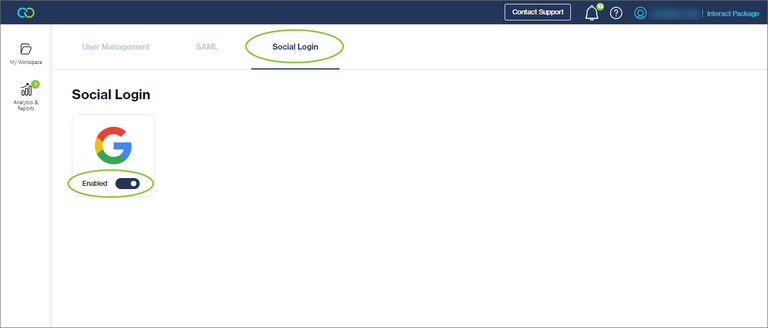
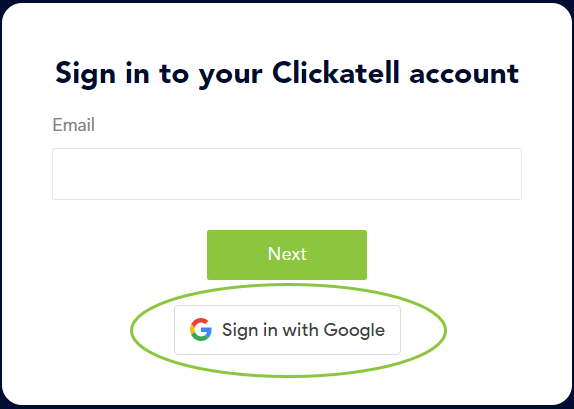
Users can now use the Sign in with Google button as an additional method of signing in to their Clickatell accounts.
Logging in when you have multiple accounts
It is possible to have multiple accounts linked to your Clickatell Portal and you can select the specific account you want to access when logging in.
For both Social Login and SAML Login, only the accounts for which it has been specifically configured and enabled are displayed for you to select from.