Getting started with SMS
Archived
On this page, we introduce you to Clickatell’s SMS HTTP API and how it can be used to communicate with end-users.
Why use this API?
This API enables one- and two-way communication with your customers via SMS messages. You can send one or more SMS messages by making HTTPS calls directly to the API. You can also configure your integration to cater for two-way messaging by specifying a message status callback method and destination.
When to use this API
This API is ideal if you want to send bulk SMS messages securely, reliably and instantly. You can SMS-enable any application, website or system and facilitate international two-way messaging with an easy one-step integration process. SMS is a budget-conscious channel between your business and mobile users all across the world and enables you to cut costs and scale faster. The API supports the UTF8 character set.
If you are planning to make use of other communication channels in addition to SMS, now or in the future, you might want to consider using our One API instead.
Getting started with the SMS API
Step 1: Register your Clickatell account & log in to the portal
Sign up and create your free Clickatell account. Once you’ve verified your account, log in to your Clickatell portal. The first page you see is the Launchpad which is the home page that gives you an overview of the channels and products available in Clickatell and also gives you a summary of all the channels and products you have activated on your account. From here you can activate and set up the channels and products that you want to utilize. You can also use the left panel to navigate to the specific sections for more details.
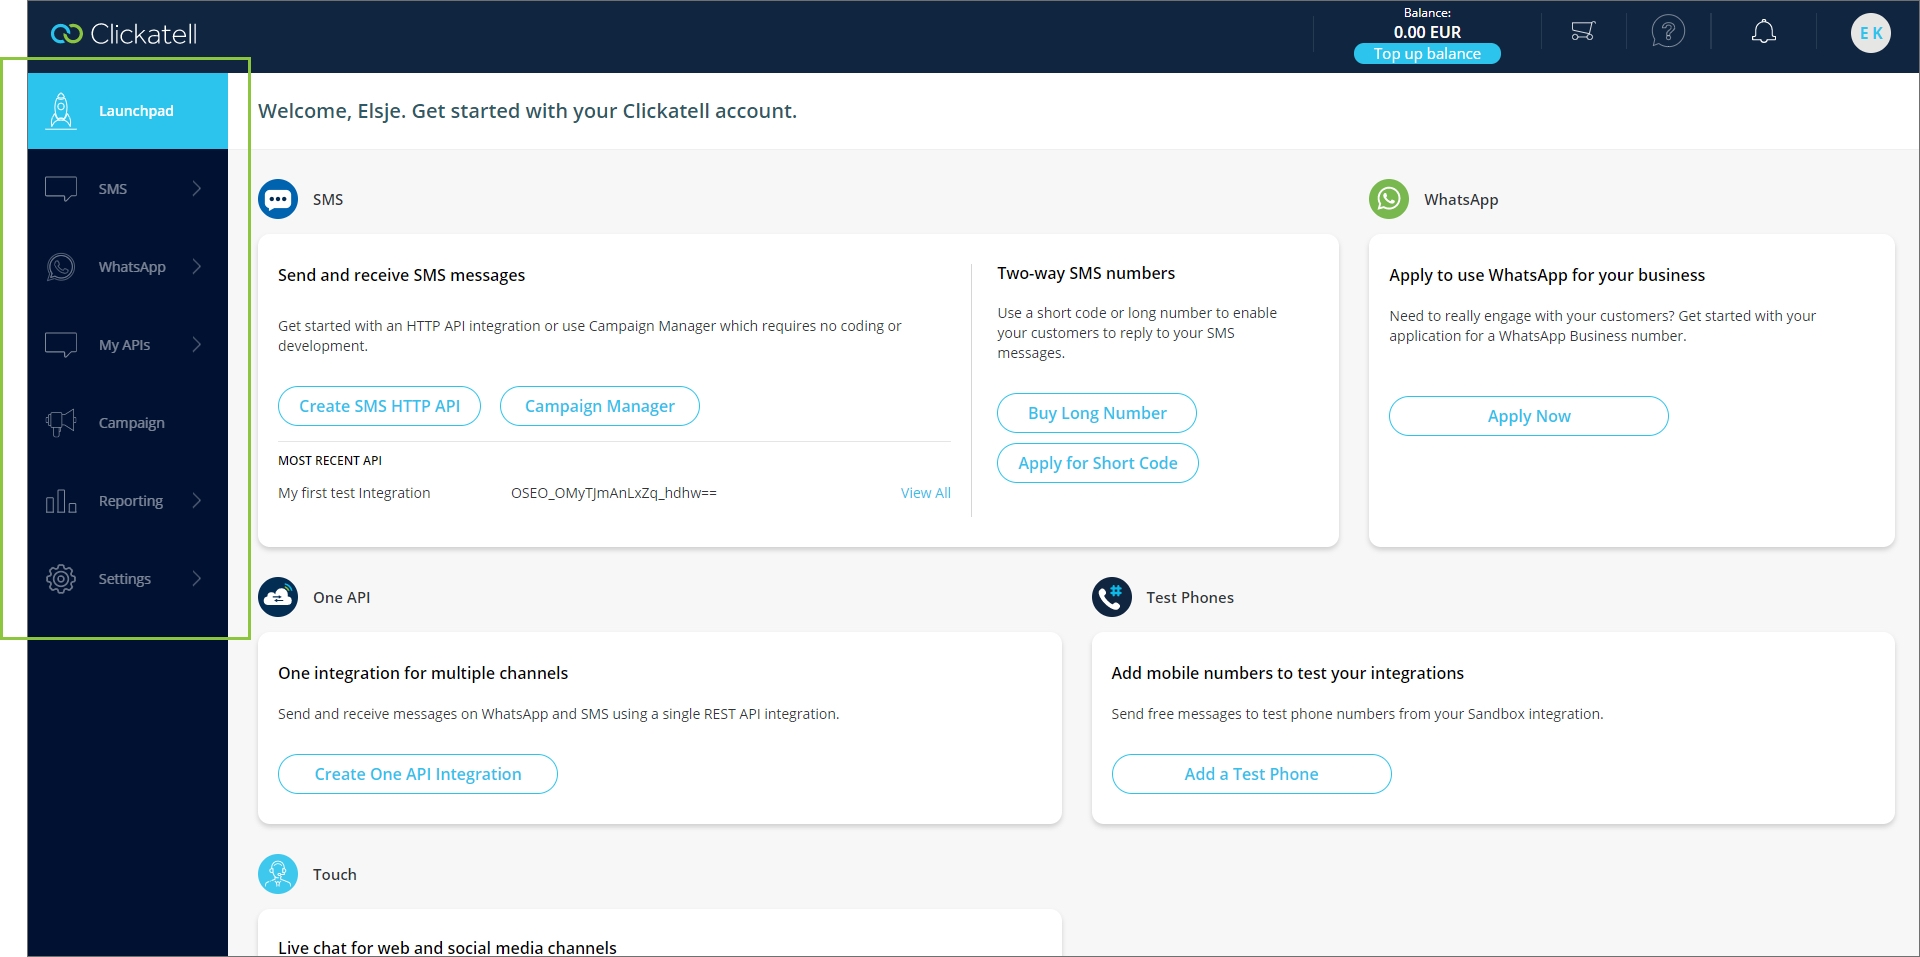
Step 2: Generate the API key
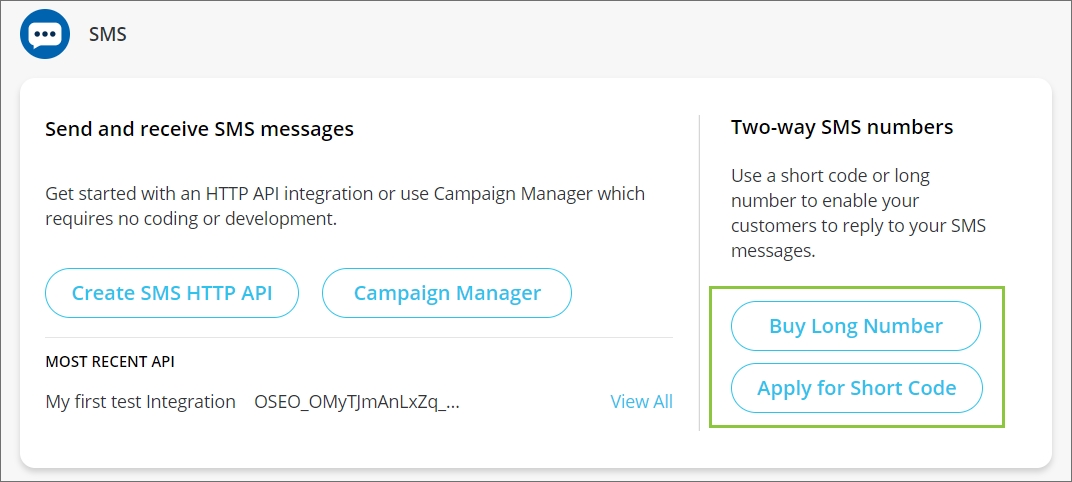
On your Launchpad, click on the ‘Create SMS HTTP API‘ button in the SMS section and complete the three steps that are displayed on the screen. The resulting API Key is the authentication token used to call and unlock your specific integration service.
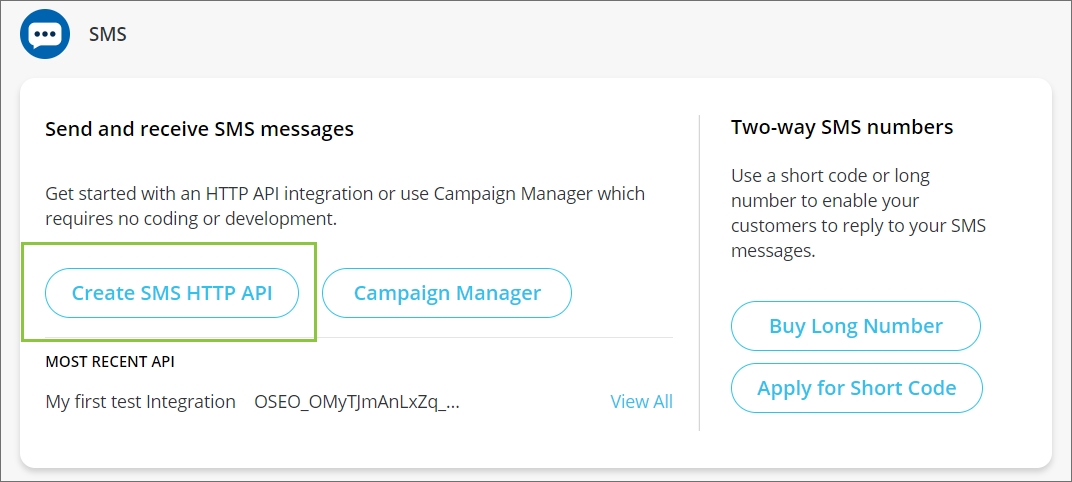
Step 2.1: Add test phone numbers (optional)
To test the sending and/or receiving of messages from the Sandbox environment, you can add up to three test phone numbers to your account. Click on the ‘Add test phones’ button and follow the prompts. Note that phone numbers must be entered in international format and must contain no spaces or other non-numeric characters. You can also add test phones by navigating to ‘SMS → Test phones‘ from the panel on the left, or simply clicking the ‘Add a Test Phone‘ button from your Launchpad. Once at least one test phone has been set up, you can test your API.
All messages to test phone numbers are free. Once integrations have been promoted to production, messages to other phones will be charged as per the selected plan.
Step 2.2 Create and test an SMS integration in Sandbox
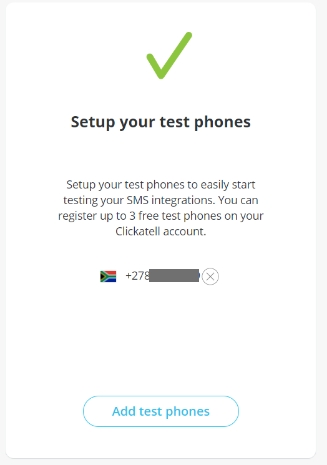
Click the ‘Create new integration’ button and complete the setup wizard. You will have to specify the messaging type (one-way or two-way) and delivery type (standard or time-critical), and edit message-specific settings to fit your needs. Once you’ve saved your integration, you will be presented with your API key.
If two-way messaging was selected, you have to purchase a long number or short code in order to receive replies to your messages. Your integration will remain in the Sandbox environment until your long number or short code has been activated. See Step 3 below on how to acquire a short code / long number.
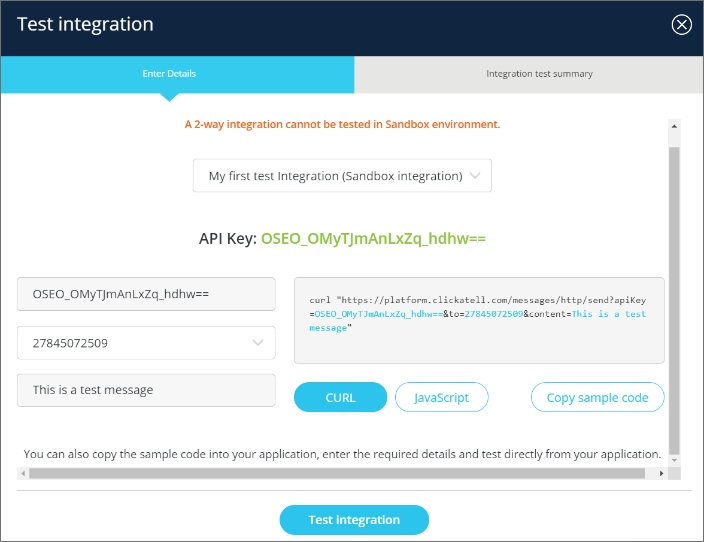
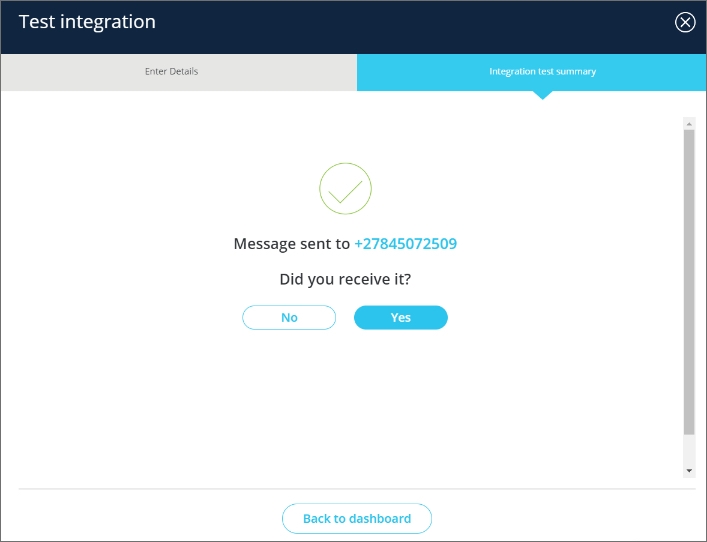
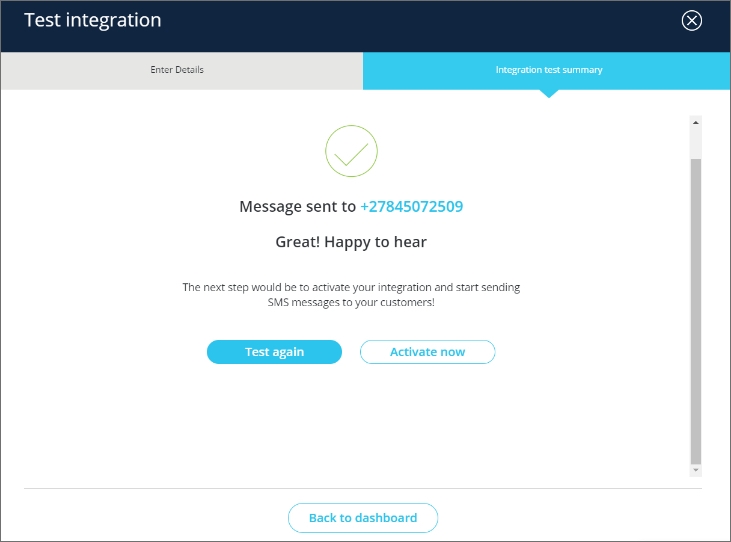
We recommend testing your API before deploying it to your live environment. Click on the ‘Test integrations’ button. You can either follow the steps in the testing wizard or copy the sample code to test it directly from your application. Once you are done testing, you can decide to activate the API immediately or to do it at a later stage.

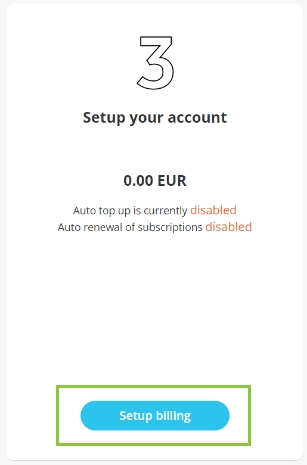
Step 2.3 Setup billing details
You cannot use your integration in the Production environment until your billing details have been set up. Your integration will remain in Sandbox and you can continue testing the API, but you will not be able to promote it to Production. You will also not be able to purchase long numbers or apply for short codes without billing details. To set up your billing details, click on the ‘Setup billing‘ button and enter the required fields. You can also navigate to your billing details by clicking on ‘Settings → Billing & Payments‘ from the panel on the left.
Step 3: Acquire a number
Whether you need to acquire a dedicated number depends on the type of messages you plan to send.
One-way SMS
If you only want to send SMS messages (i.e. no replies required), you can do that straight-away without applying for a dedicated number.
Country-specific regulations may apply since certain countries do not allow the sending of one-way messages.
Two-way SMS
If you want to both send SMS messages and receive replies, you need to acquire a two-way number. You can either apply for a short code or purchase a long number by selecting your preferred option from the Launchpad or by navigating to SMS → SMS add-ons and following the prompts.
Step 4: Activate your API on Production
Once you’ve tested your API, set up your billing details and acquired a number (if necessary), you can promote your API from Sandbox to Production.
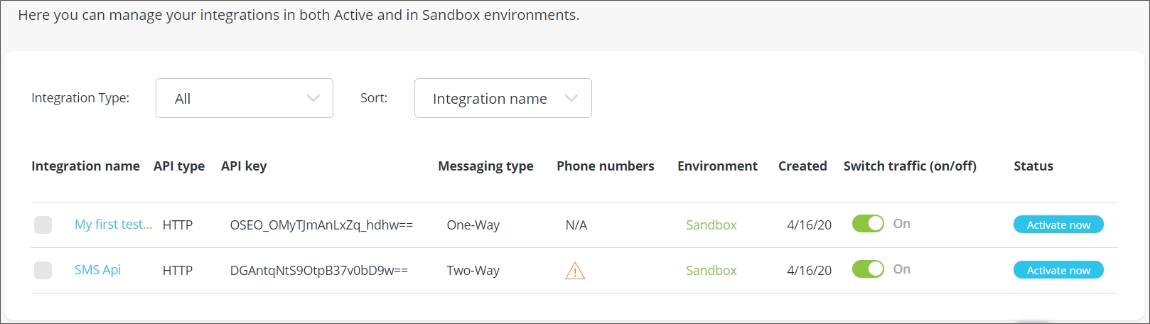
Navigate to ‘SMS → Configure SMS’. At the bottom of your page is a table listing your SMS integrations. Click on the ‘Activate now‘ button next to the API you want to move from Sandbox to Production. This will run you through a wizard so you can confirm the API details and update it if necessary. Clicking ‘Finish‘ will activate your API on Production.
Step 5: Using your API
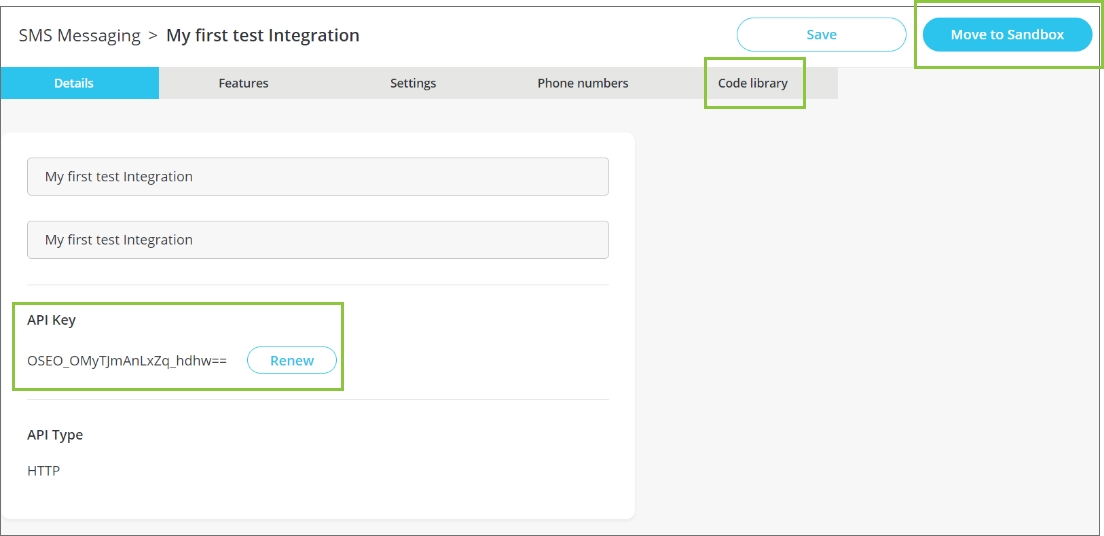
To view and edit the details of your API, navigate to ‘SMS → Configure SMS’. Click on the relevant API from the table at the bottom of your page. From here you will be able to update any of your API details or move the API integration back into the Sandbox. You can also view the API Key and renew it if it was compromised. It gives you access to the code library of your integration with an example. To send your first message, you can simply copy this example URL directly into your web browser replacing the text message with your own. The server will respond with a unique identifier for each message (referred to as an API Message ID). This API Message ID can be used to track and monitor the status of your message.
You will only be able to send messages in your Production environment if you have added a payment method and topped up your balance. Where test messages are free, the cost for live messages is subtracted from your account balance.
If your API was set up for two-way integration (i.e. sending and receiving SMS messages), a ‘Two-way settings‘ tab will also be visible. Here you can configure:
Reply callbacks – define the method as well as the destination URL where any replies received will be sent
Stop commands – allow the recipient to opt out of receiving communication; considered as best practice, and mandatory in the United States